|
|
Air Brush
I love airbrushing. The result is very good and it's fast. The only down side of airbrushing is that you need to clean your airbrush every time you use it. Not only that, but you need to clean it well. Otherwise it will affect the performance of the airbrush and its lifetime.
You should always try to purchase a double action airbrush. Single action airbrushes are just not quite worth the money to buy. Remember, you don't have to get the best airbrush right away. Try instead working with a cheap double action airbrush first and then once you get used to it move on to a better airbrush. Of course having two airbrushes is always good as you can use one for acrylic paint and the other for enamel/lacquer paint, or for when you are spraying something half way and then realize that you need to airbrush another colour first. In this situation, your second airbrush will come in handy and it will save you from having to waste the paint you just poured into your airbrush.
For the compressor, try to get one with an air tank. I know they are much more expensive, but their performance is far superior, giving you a more steady air pressure (which is especially useful if you want to do very detailed airbrushing). Also always get a moisture trap and air flow regulator. A good air compressor will come with one, but if it doesn't you will need to buy one and attach it to your air compressor. Another thing you might want to consider is getting a silenced air compressor. I find this useful for working at night without waking up anyone else. Cheaper air compressors sold at hardware stores are usually fairly noisy, so I don't recommend getting them. Nevertheless, they are much, much cheaper in price so if you�re on a budget you might want to consider them. In the end consider you options and make the best decision suited for you.
As always, remember to wear a mask before you start airbrushing. All the paints are toxic (even acrylic paint, and lacquer paint especially dangerous), so wearing a mask while airbrushing is very important to your health.
Lacquer base paints are very toxic, but they dry much faster and are much tougher than their acrylic paint counterparts. And by that I mean they don't become damaged as easily. They are particularly good for painting all types of mecha (like Gundam or FSS kit). If you are painting "gunpla" (plastic Gundam kits) with lacquer base paints (i.e. "Mr. Color" paint), you don't even need to prime the pieces before you paint them.
To airbrush, you need to thin your paint first. They need to be much thinner than what you use for hand painting. The thinner used for lacquer, enamel, and acrylic paints are not interchangeable. But you can use lacquer thinner for acrylic paints (most of the acrylic paint, but on some acrylic paints like "Tamiya's Polycarbinate", it will not work). How much thinner to add to the paint depends on your air pressure, type of airbrush, paints, colours, and the final result you wish to achieve. Generally it is about a 1:1 ratio between paint and thinner. If your paint is too thick it will not spray smoothly, forcing you to either add more thinner or increase your air pressure. Sometimes this problem is caused by "dirt" (dry paint) in your airbrush, so you need to clean your airbrush in order to make it function properly once more. Obviously it goes without saying that you should regularly clean your airbrush to avoid this problem from occurring. Also, if your paint is too thin and
sprays out like water, you need to make it thicker or decrease your air pressure.
|
|
|
If you want to do general spraying for large area, you can increase the air pressure (generally around 25-30/psi) and spray it at a distance of about one and a half pen lengths (pens are easier to visualize than inches, don�t you think?). And when you airbrushing, you should move your airbrush, otherwise it will create �hot spots� where paint accumulates. If you want to do fine detailed spraying you need to thin the paint a bit more than usual and decrease your air pressure (should range between 10-25/psi, depending on the type of paint and exactly how thin you thin the paints). In the end practice makes perfect, as experience has taught me.
|
|
|
|
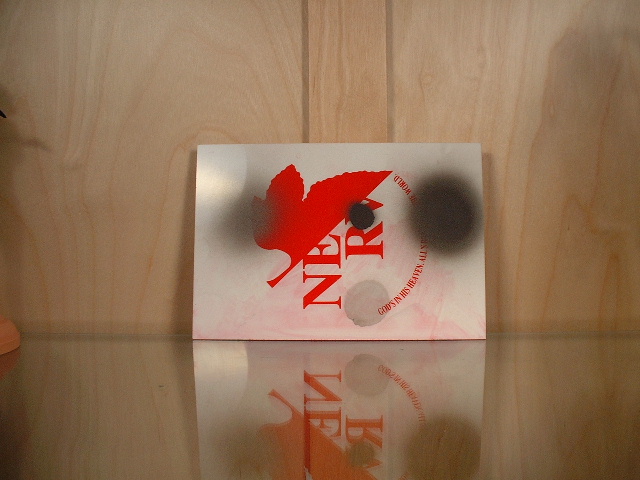
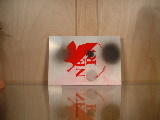
How much is too much thinner?
|
|
|
|
In this photo the black spot on the far right is what you want to achieve most of the time. The black spot located at the center top is an example of what happens when you spray too close to the model. The faint black spot on the far left is an example of spraying too far away from the model, unless of course you are tinting. In that case it's an entirely different story; it should be that light. The black spot on the bottom is an example of when the paint is too thin. When paint is thin like this, it takes forever to cover anything. By the way, don�t mind the NERV logo and all the red colouring here... it has nothing to do with this example.
Now let's discuss highlighting and shading. Painting lighter colours on top of darker colours is often referred to as highlighting. Painting darker colours on top of lighter colours is called shading. I generally call them "light on dark" and "dark on light" techniques. Both methods are used to create contrast, thus giving an object a more depth and realism.
Light on dark is the easier method of the two. The chance of messing it up is significantly lower. On the other hand it doesn't create as strong a contrast. What Max does for gunpla's white colour is the light on dark technique (people call this method "Max Technique", since he was the first person to use shading on gunpla).
Dark on light is a far more difficult method to master. Because dark colours cover light colours very quickly it is difficult to create a nice blend between the dark and light colours. Nevertheless, it creates a much stronger contrast, thus producing a better look for the model. So of the two techniques true contrast can only be achieved with the dark on light technique.
Remember, you can use both techniques for flat, semi-gloss, or gloss. It�s not just limited to flat. A lot of people think this technique is only for flat colours and think the Max Technique is different. I�m here to tell you otherwise. You can also create multiple coats of highlight and shading so you can always go dark -> medium -> light, or light -> medium -> dark. You can create as many layers of highlight/shading as you want. In most situations 2-3 layers is enough, but there will be situations where you will want to do more than 3...
Also, you can go from medium -> dark -> light, or medium -> light -> dark. Which means you are using both methods at the same time. Beware that if you do this, and you need to do any repair work afterwards, it will be pretty troublesome to repair. You might end up re-spraying the entire object all over again (otherwise the colour will not match in exactly the same way, even if you have the original mixture). The same goes for the dark on light technique. If you mess up in some areas and want to re-spray only that area, it's not really possible. Instead you will need to redo the entire colour again.
|
|
|
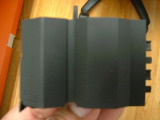
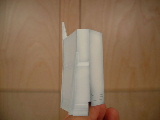
Now let's go through an example of light on dark. This is the method that Max always likes to use. First you spray everything black:
|
|
|
|
This is the easy part...
|
|
|
|
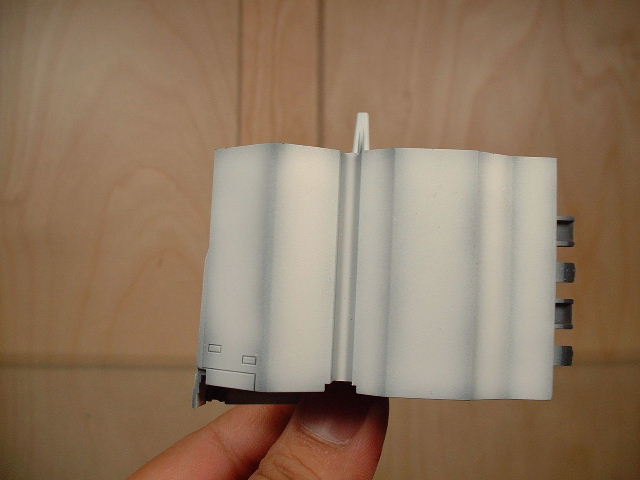
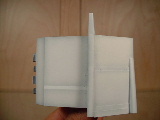
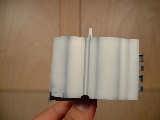
Then you spray the white paint (or bluish white paint, which will cover a lot faster). If you are doing the Max Technique you need to avoid spraying white on any edges, corners, or panel lines. If you are highlighting, then simply spray the white on all the raised areas, or where the natural light will hit the surface (for when the object is on display). For regular highlighting, you probably will not have to create such an extreme contrast (i.e. black base and white top coat). This example is really for those people who want to know the Max Technique in all its glory.
|
|
|
|
Behold! The Max Technique in all its glory! Pretty sweet, huh?
|
|
|
|
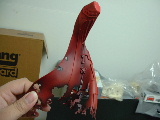
Now let's see an example of the dark on light technique.
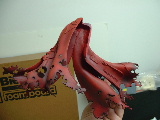
For some reason, it�s very easy to use the dark on light technique with the colour red. So if you want to practice the dark on light technique, I recommend that you start with the colour red.
Here I painted the model piece pure red, and added some highlighting as well (for some reason, highlights for red never really show that well with my digital camera, go figure).
|
|

|
|
Now that's what I call bright red. Time to add some realism to it though...
|
|
|
|
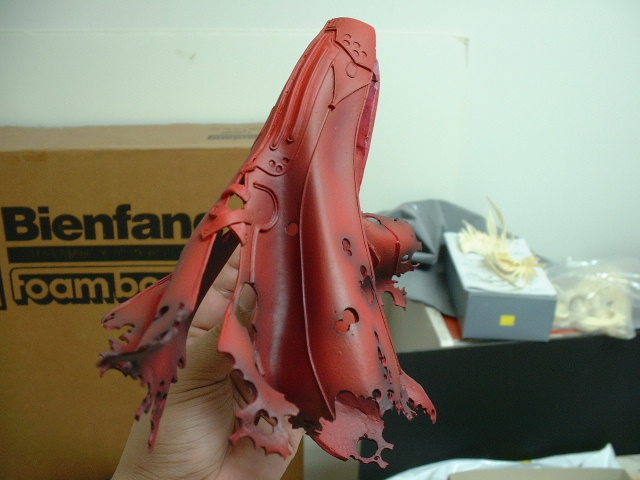
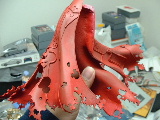
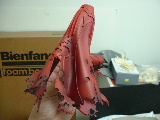
Here I applied the dark colouring on all the shading areas, and then I sprayed pure black around all the bullet holes:
|
|
|
|
...so how's this for realism? Shading can do a world of good...if done properly.
|
|
|
|
You can see how the dark on light technique creates a much stronger contrast, so it's more appealing in many cases.
The last thing I want to cover for airbrushing is tinting. Tinting means you want to alter the entire piece's colouring just a bit. Let�s say the skin tone is too yellow and you want to make it more...reddish. Now you want to do this without having to repaint the entire model all over again. In this situation you should use tinting. Tinting is where you use very diluted paint to slightly go over the pieces in order to alter the colour. This method can save you from repeating all of the highlighting and shading work you�ve done. Of course you need to be careful to tint each piece with the same degree of intensity, otherwise the colour will end up looking different. Also, if you make a scratch on the paint and want to touch up...well I'm sorry to say this, but in my experience your only real choice is to re-spray the entire thing over again.
Hand Brush
There really isn�t a lot to say about hand painting. All you need is practice, practice and more practice. Having a steady hand makes you good at hand painting. If you don't get good results at the beginning though, don't give up, after a few more tries you will eventually get better. Why when I started off I was amazing at hand painting! No wait, I guess this doesn�t make for a good example...maybe if I was bad at first and then I became better later on...say, with practice. Yes, that sounds better, think of my example like that.
I prefer acrylic paint for hand painting then lacquer base paints. Especially with tube paints. They are so much easier to clean and don't smell as bad. They dry slower, so they don't leave behind brush strokes as easy as lacquer/enamel base paints do. Of course, you can always add retarder to the paint to slow down the drying process and minimize the visible brush strokes. As a word of warning you should know that the retarder for lacquer/enamel/acrylic paints are all different (i.e. don't use "Mr. Retarder Mild" for acrylic paint, or vise versa).
For hand painting, all you need to remember is never brush on top of half-dried paint. The safest way of hand painting would be to layer a thick coat of paint all at once. Then wait for the paint to dry completely before adding another layer on top. Usually you need at least 2-3 coats to completely cover the base paint. White will probably take longer, and for that reason I usually airbrush white on models. It takes much longer to hand paint the colour white.
When creating highlights with hand painting you can just brush a lighter colour on top of a darker colour. But for shading, you probably will need to use a washing technique.
Washing refers to using very diluted (very watery) paint in order to paint on top of lighter colours. When the paint is diluted it covers the base coat a lot slower, allowing you to have more control over it. If your paint is not diluted enough the dark colour will cover the light colour so fast that it will leave harsh lines.
You can also use the washing technique to draw panel lines or paint some of the very complex, raised details. Diluted paint will automatically flow into the lower area, thus creating a shading effect. Of course, you can also use a dry brush technique.
Dry brushing means using a lighter colour of paint and then softly brushing the raised detail. You first need to make sure there is only a little paint on the brush and the paint should be pretty dry. A good way of dry brushing is after you pick up the paint with your brush use a paper tower to remove the excess paint and then to start dry brushing.
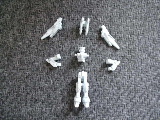
Here is an example on how I hand brushed the 1/550 scale GP03S:
|
|
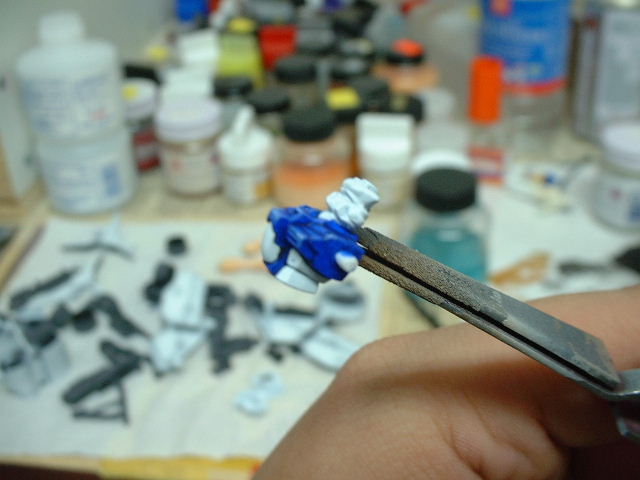
Step 1: I first use white primer to paint all the pieces white: |
|
|
|
Step 1
|
|
|
|
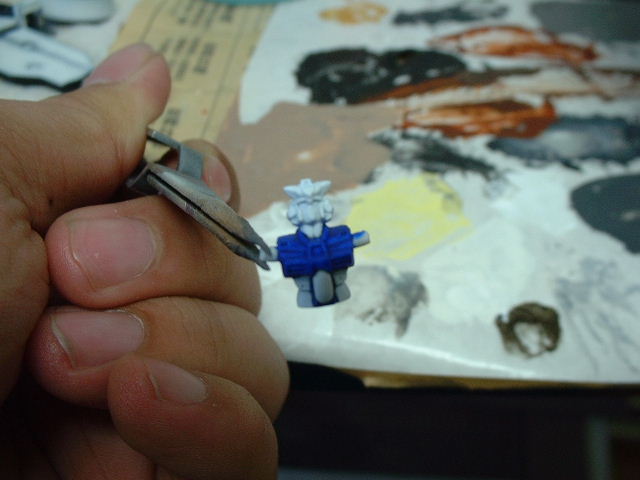
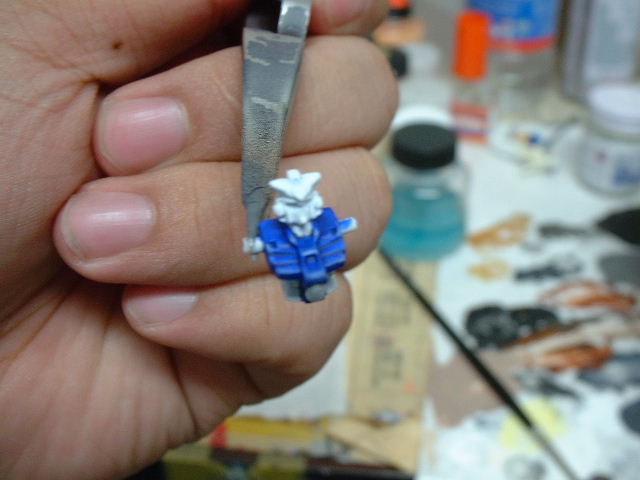
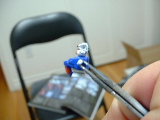
Step 2: I paint the blue sections with a solid blue colour: |
|

|
|
Step 2
|
|
|
|
|
|
Step 3: Paint the highlights for the blue colour:
|
|
|
|
|
|
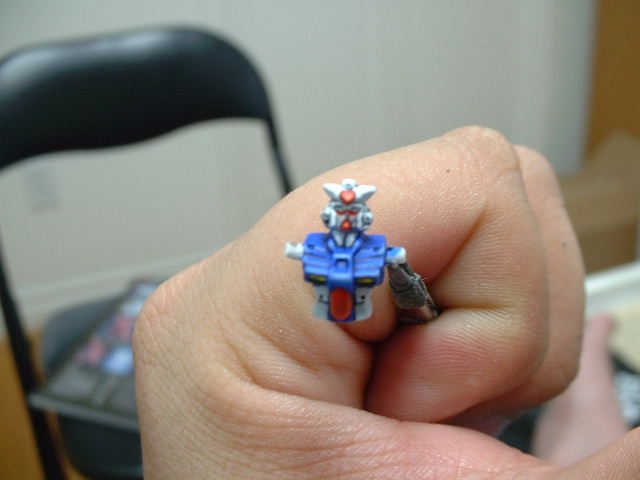
Step 4: Paint in the red and the yellow areas: |
|

|
|
Step 4
|
|
|
|
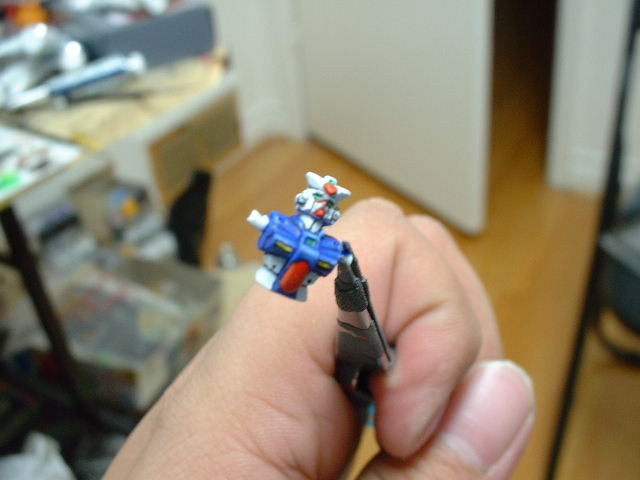
Step 5: Add highlights and use the washing technique to darken the yellow shade: |
|
|
|
Step 5
|
|
|
|
|
|
Step 6: Paint in the green colour. Most of the green coloured areas are too small so I didn't bother to do any highlighting or shading. For white I use washing to shade the colour a bit grey (but it's hard to see them from the photos): |
|
|

|
|
Step 6
|
|
|
|
|
|